Home » General Appliance Guides & Advice » The Safest Way to Clean Burnt Spills on an Induction Hob
The Safest Way to Clean Burnt Spills on an Induction Hob
Burnt spills on an induction hob are frustrating, but using the wrong method makes things worse — abrasive pads and harsh chemicals can scratch the glass or leave permanent dull marks. The right approach is to soften the residue first and lift it away gently with the correct tools. Done correctly, even heavily carbonised spills can be removed without a trace.
Cleaning Routine at a Glance
Four steps to a clean induction hob
Never use steel wool, abrasive scourers, oven cleaner, bleach-based products, or sharp tools on an induction hob. These permanently damage the glass-ceramic surface — damage that cannot be reversed.
Why Burnt Spills Need Careful Treatment
An induction hob’s cooking surface is glass-ceramic — the same material used on ceramic hobs, but with different thermal properties. While it is hard and durable against everyday use, it is susceptible to surface scratching from abrasive materials, and to crazing from sudden temperature changes. Glass-ceramic is also porous enough that certain acids and alkalis can etch the surface if left in contact for extended periods.
Most burnt spills are either carbonised food residue or, in the case of sugary spills, caramelised or vitrified sugar. Sugar spills are the most urgent to address — heated sugar bonds very strongly to glass-ceramic and, if left to cool completely and harden, becomes significantly harder to remove than carbonised food. It can also cause crazing if removed while the glass is still hot and then rapidly cooled. Both types respond well to the softening-first approach, but neither responds well to scrubbing.
What You Need
- Microfibre cloth (two — one damp, one dry)
- Warm water
- Mild washing-up liquid or specialist ceramic hob cleaner
- Glass hob scraper (flat-bladed, designed for ceramic hobs)
- Hob cleaning cream (optional, for polishing)
A glass hob scraper is the single most useful tool for burnt-on residue. It is not a knife — it is a purpose-designed flat blade in a handle that allows you to apply controlled, shallow-angle pressure to the glass surface. Used correctly it removes burnt deposits without scratching. Used incorrectly — at a steep angle or with excessive force — it can scratch. If you do not already have one, they are inexpensive and available at most cookware retailers.
Step-by-Step Cleaning Method
- 1
Ensure the hob is safe to touch
Switch off the hob and wait for any residual heat indicators to clear. A slightly warm surface — not hot — can actually help loosen residue, but working on a cool surface is safer and gives you more control. Never clean an induction hob that is still hot enough to cause burns.
- 2
Remove loose debris
Gently wipe away crumbs, dry food particles, and any loose surface residue with a soft dry cloth. This prevents loose particles from being dragged across the glass when you apply the cleaner — dragging grit across glass under pressure is the most common cause of fine surface scratches during cleaning.
- 3
Apply cleaner and leave it to work
Apply a small amount of specialist ceramic hob cleaner directly onto the burnt residue, or dampen a cloth with warm water and a few drops of mild washing-up liquid and lay it over the affected area. Leave it in place for two to three minutes. The moisture and surfactant need time to penetrate and soften the bond between the residue and the glass — applying and immediately wiping is less effective and requires more force.
- 4
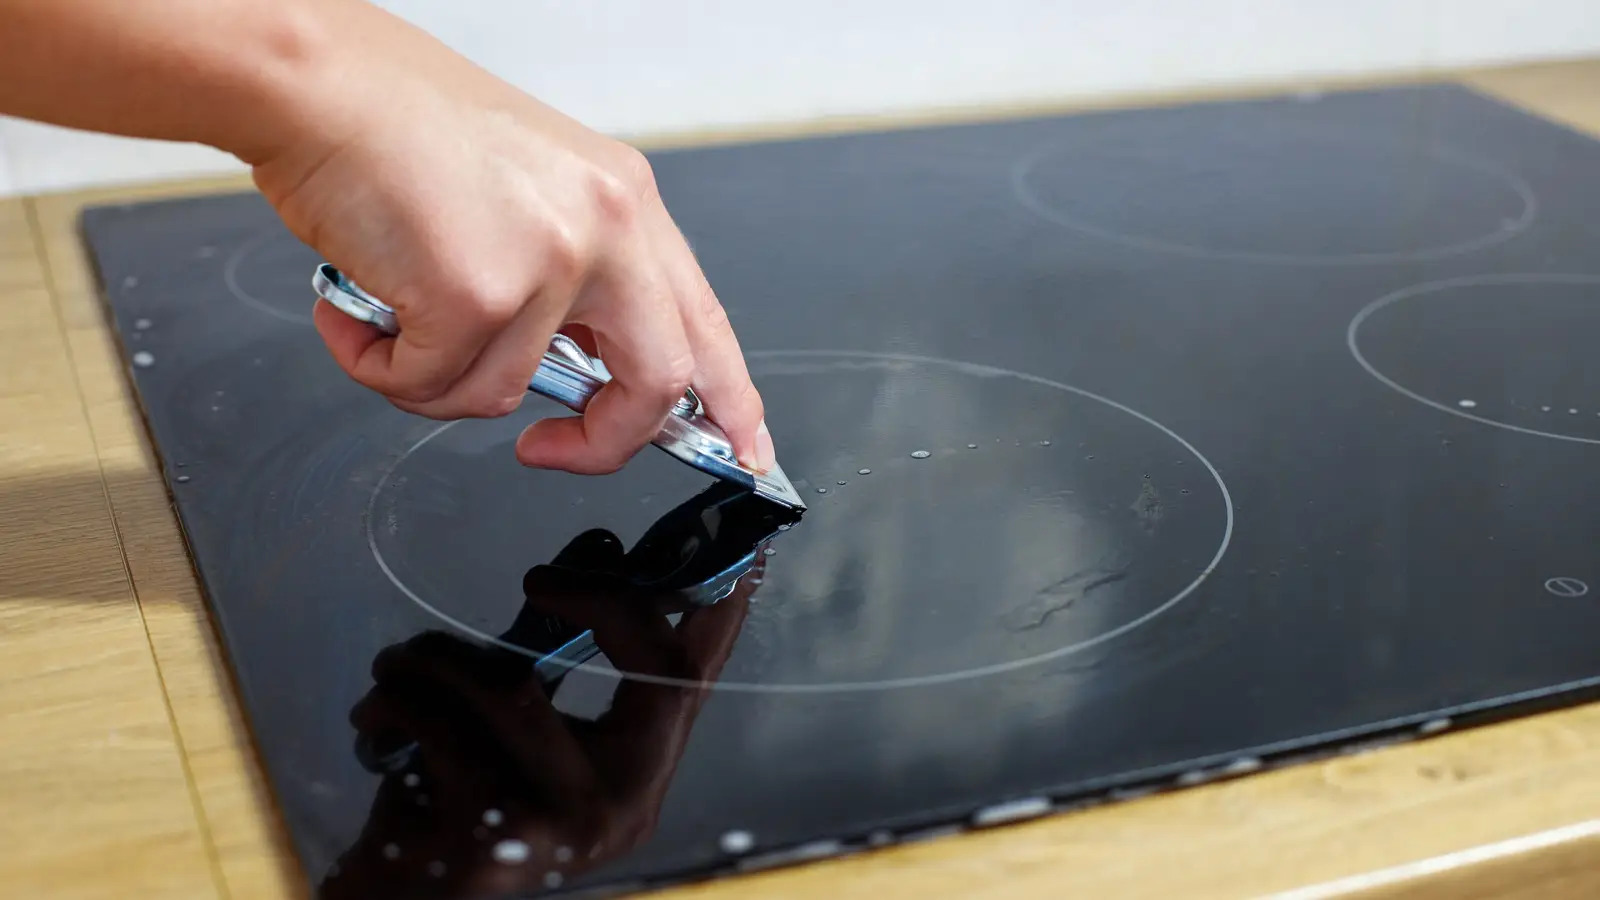
Use the scraper for stubborn deposits
For residue that has not loosened enough to wipe away, hold the hob scraper at a very shallow angle — almost flat to the surface, around 15 to 20 degrees. Apply gentle, steady forward pressure and slide the blade under the burnt deposit. The goal is to shear the residue away from the glass, not to press down through it. Work from the edge of the deposit inward, and reapply cleaner between passes if the residue is particularly thick.
- 5
Wipe clean
Use a clean damp microfibre cloth to remove all loosened residue and any remaining cleaner from the surface. Rinse and wring the cloth between wipes to avoid spreading residue back over the glass. Check the surface in a raking light — angling so light crosses the surface at a low angle — to spot any residue you may have missed.
- 6
Dry and buff to a streak-free finish
Use a clean dry microfibre cloth to buff the surface until no streaks or watermarks remain. For an enhanced finish, apply a small amount of ceramic hob cleaning cream, rub in gently with a soft cloth, and buff off — this leaves a light protective layer that makes future spills easier to wipe away.
What to Use and What to Avoid
Safe to use
- Microfibre cloths — soft, non-abrasive, highly effective at picking up residue
- Specialist ceramic hob cleaner — formulated for glass-ceramic, cleans and polishes
- Mild washing-up liquid diluted in warm water — safe for everyday cleaning
- Glass hob scraper used at a shallow angle — the correct tool for burnt-on residue
- Ceramic hob cleaning cream — polishes and protects the surface after cleaning
- White vinegar diluted in water — effective on limescale and water marks
Never use
- Abrasive scourers or scouring pads — will scratch the glass-ceramic surface
- Steel wool — causes immediate and irreversible surface damage
- Oven cleaner — typically too caustic for glass-ceramic and can etch the surface
- Bleach or bleach-based cleaners — can discolour and damage the surface over time
- Kitchen knives or sharp metal tools — will scratch regardless of pressure
- Rough paper towels — can leave fine scratches across the surface over repeated use
How to Prevent Burnt Spills
Keeping the hob clean between major sessions is considerably easier than removing carbonised residue once it has been there for days. A few habits make a significant difference.
- Wipe after every use. A quick wipe with a damp cloth after each cooking session removes food splatter before it has a chance to bake on during the next use. Takes under a minute and prevents the need for more intensive cleaning.
- Address sugary spills immediately. Sugar heats and bonds to glass-ceramic very strongly. As soon as a sugary spill occurs and it is safe to do so, switch the zone off and wipe the spill away. If it has already hardened, use the scraper method while the surrounding area is still slightly warm.
- Do not overfill pans. Pans filled to their brim inevitably boil over. Leaving 3 to 5cm of headspace in a pan of pasta water or a sauce prevents the most common cause of spills.
- Check cookware bases are clean before placing them on the hob. Food residue or grease on the underside of a pan transfers to the glass surface and burns on during cooking. Wipe pan bases before use.
- Match pan size to zone size. Using a pan whose base is significantly smaller than the active zone means the outer part of the zone’s glass surface gets warm from residual heat and bakes on any nearby residue. A matching pan size concentrates the heat where it is needed and keeps the surrounding glass cooler.
For more on induction hob maintenance and care, see the guide to induction hob noise — which also covers keeping the glass surface clean to prevent crackling sounds from residue during cooking. Browse CATA’s induction hob range for models with smooth, easy-clean glass-ceramic surfaces.
Common questions answered
Can I clean a warm induction hob?
A slightly warm surface — warm to the touch but not hot enough to cause discomfort — is fine and can actually help loosen residue. Never clean a surface that is still hot enough to risk a burn. Wait for all residual heat indicators on the display to clear before beginning.
How do I remove burnt sugar specifically?
Burnt sugar is the most stubborn type of spill. If it is still warm, switch off the zone and use the scraper immediately — warm sugar is much easier to remove than cold. If it has fully hardened, apply hob cleaner and leave for several minutes to soften, then use the scraper at a very shallow angle with gentle, steady pressure. Repeat the soften-and-scrape cycle rather than increasing pressure.
Is washing-up liquid safe for regular cleaning?
Yes — mild washing-up liquid diluted in warm water is perfectly safe for everyday cleaning of an induction hob. It removes grease and light residue effectively. For heavier or burnt-on residue, a specialist ceramic hob cleaner is more effective and also leaves a light protective layer that makes subsequent cleaning easier.
How do I know if I have scratched the surface?
View the surface in a raking light — position yourself so a light source crosses the hob at a low angle. Fine scratches that are invisible in direct overhead lighting become visible this way. Light surface marks from normal use are common on older hobs and do not affect cooking performance. Deep scratches from abrasive cleaning are more visible and, if they penetrate the surface coating, can worsen over time.
Explore More Kitchen Advice & Buying Guides
Browse our latest articles covering appliance tips, energy-saving advice, and expert guidance – designed to help you choose, use, and get the most from your kitchen appliances.