Home » Cooker Hood Guides & Advice » What to do if your cooker hood fan sounds like it’s rattling?
What to Do If Your Cooker Hood Fan Sounds Like It’s Rattling
A rattling cooker hood is almost always caused by something loose or obstructed, rarely by a component failure. Most causes are user-fixable in under ten minutes with no tools. Work through the checks below in order before concluding a professional repair is needed.
The most common cause by a wide margin. Grease filters sit in clips or channels on the underside of the hood. If they are not fully clicked in, or if they have been refitted slightly misaligned after cleaning, vibration from the fan causes them to rattle against the hood body. The noise typically starts or changes intensity when the fan speed increases.
Objects stored on top of a freestanding hood, loose items in the cabinet above an integrated hood, or anything resting against the chimney flue can vibrate sympathetically when the fan runs. This is the second most common cause and is frequently mistaken for an internal fault.
Continuous vibration from the fan motor gradually loosens screws on the hood casing, chimney sections, and wall brackets. A loose chimney flue section is a common source of rattling on chimney hoods in particular. The noise often changes with fan speed and may be worse at one specific speed than others.
Over time, grease accumulates on the fan blades asymmetrically. One blade picks up more build-up than another, creating an imbalance. An imbalanced fan produces a rhythmic vibration or wobble that presents as a rattle, particularly at higher speeds. The noise is cyclical rather than constant.
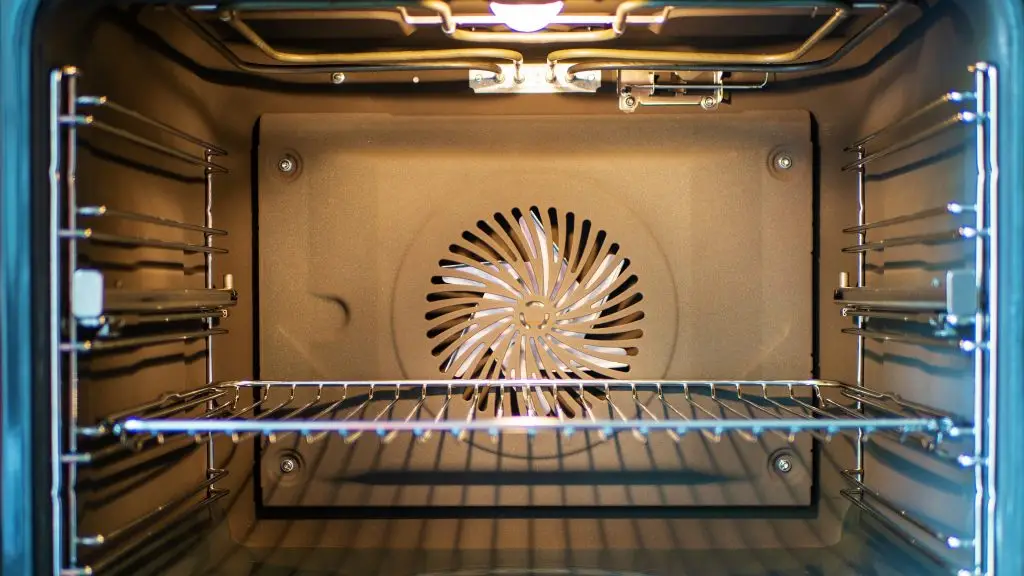
The fan blades are accessible on most hoods by removing the filters and looking up into the housing. Clean visible blades carefully with a degreaser spray and a soft cloth. Do not use anything that could snag in the moving parts.
Small debris (a piece of packaging, a loose screw from installation or cleaning work, accumulated hardened grease) can become lodged near the fan or in the duct entry. The fan may knock against it intermittently at certain speeds, producing an irregular rather than constant rattle.
The duct carrying extracted air to the outside can vibrate if it is inadequately secured, if joints have loosened over time, or if the duct contacts a wall or cabinet surface at a resonant point. The noise may not sound like it is coming from the hood itself, but from above or behind the installation.
If all the above checks are clear and the rattle persists, the fan motor bearings may be wearing. A worn bearing produces a persistent grinding or rattling noise that increases with fan speed and does not change when the hood body is touched or when filters are removed. This is a motor replacement, a professional repair rather than a user fix.
Work through these before calling an engineer
- Remove and refit all grease filters: confirm each one clicks fully into place
- Clear items from the top of the hood and any cabinet directly above
- Check and tighten all visible external screws on the hood body and chimney
- Run the fan at each speed and listen for whether the noise changes. This helps identify the cause
- Inspect accessible fan blades for grease build-up and clean if needed
- Check for visible debris in the filter housing and duct entry
- Confirm the duct run is secured and not in contact with surfaces that could vibrate
For spare parts, service contacts, and model-specific guidance, visit the CATA product support pages. For guidance on cooker hood sizing and installation requirements that affect long-term performance, see what size cooker hood do I need.
Explore More Kitchen Advice & Buying Guides
Browse our latest articles covering appliance tips, energy-saving advice, and expert guidance – designed to help you choose, use, and get the most from your kitchen appliances.